# Create a Discord Slash Bot using HarperDB Custom Functions
Hello folks 👋!
Have you ever created a Node.js server using Express/Fastify? Have you used a service like HarperDB to store your data?
If yes, then you are in luck! HarperDB has introduced [Custom Functions](https://harperdb.io/docs/custom-functions/) which helps us to use HarperDB methods to create our custom API endpoints. Custom Functions are written in Node.js and are powered by Fastify.
HarperDB Custom Functions can be used to power things like integration with third-party apps and APIs, AI, third-party authentication, defining database functionality, and serving a website.
All the things that we will cover in this tutorial are within the FREE tier of HarperDB.
- *If you want to review the code at any point, [here is the GitHub repo](https://github.com/geekysrm/harperdb-discordbot)* .
## What are we going to build?
We will build a Discord bot which responds to [slash commands](https://support.discord.com/hc/en-us/articles/1500000368501-Slash-Commands-FAQ) .
Users can say a programming joke on the discord channel using **/sayjoke** command. We will keep count of the number of jokes each user has posted and the jokes in a HarperDB database.
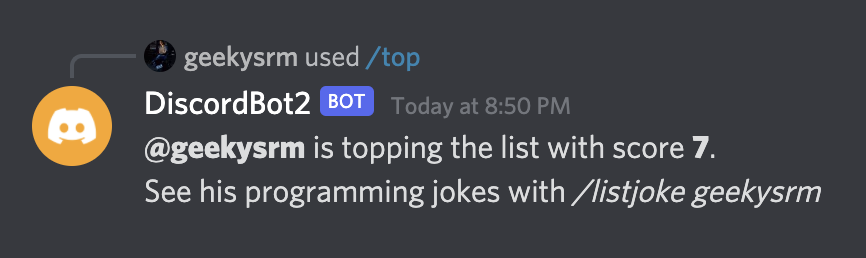
Any user can use the **/top** command to see who is the user who has posted the most programming jokes.
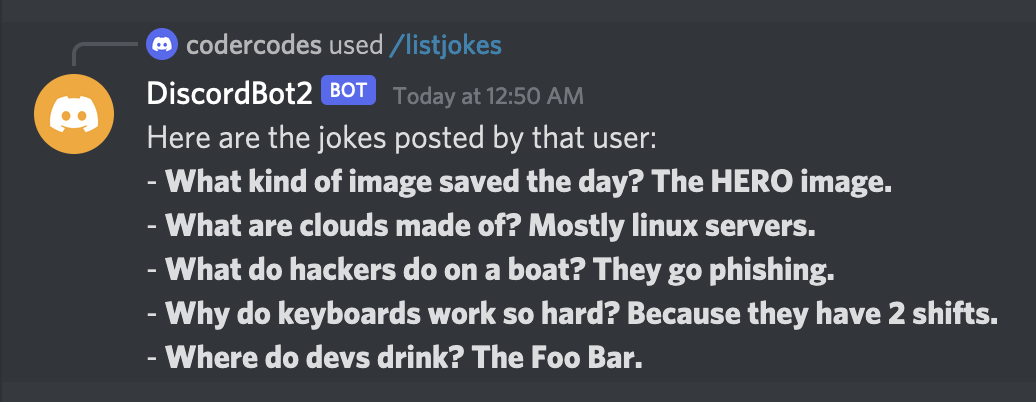
And finally, one can view the jokes posted by a particular user by using the **/listjokes** command.
Our bot will be able to fetch the data from the HarperDB database, perform some logic and respond to the user with the results.
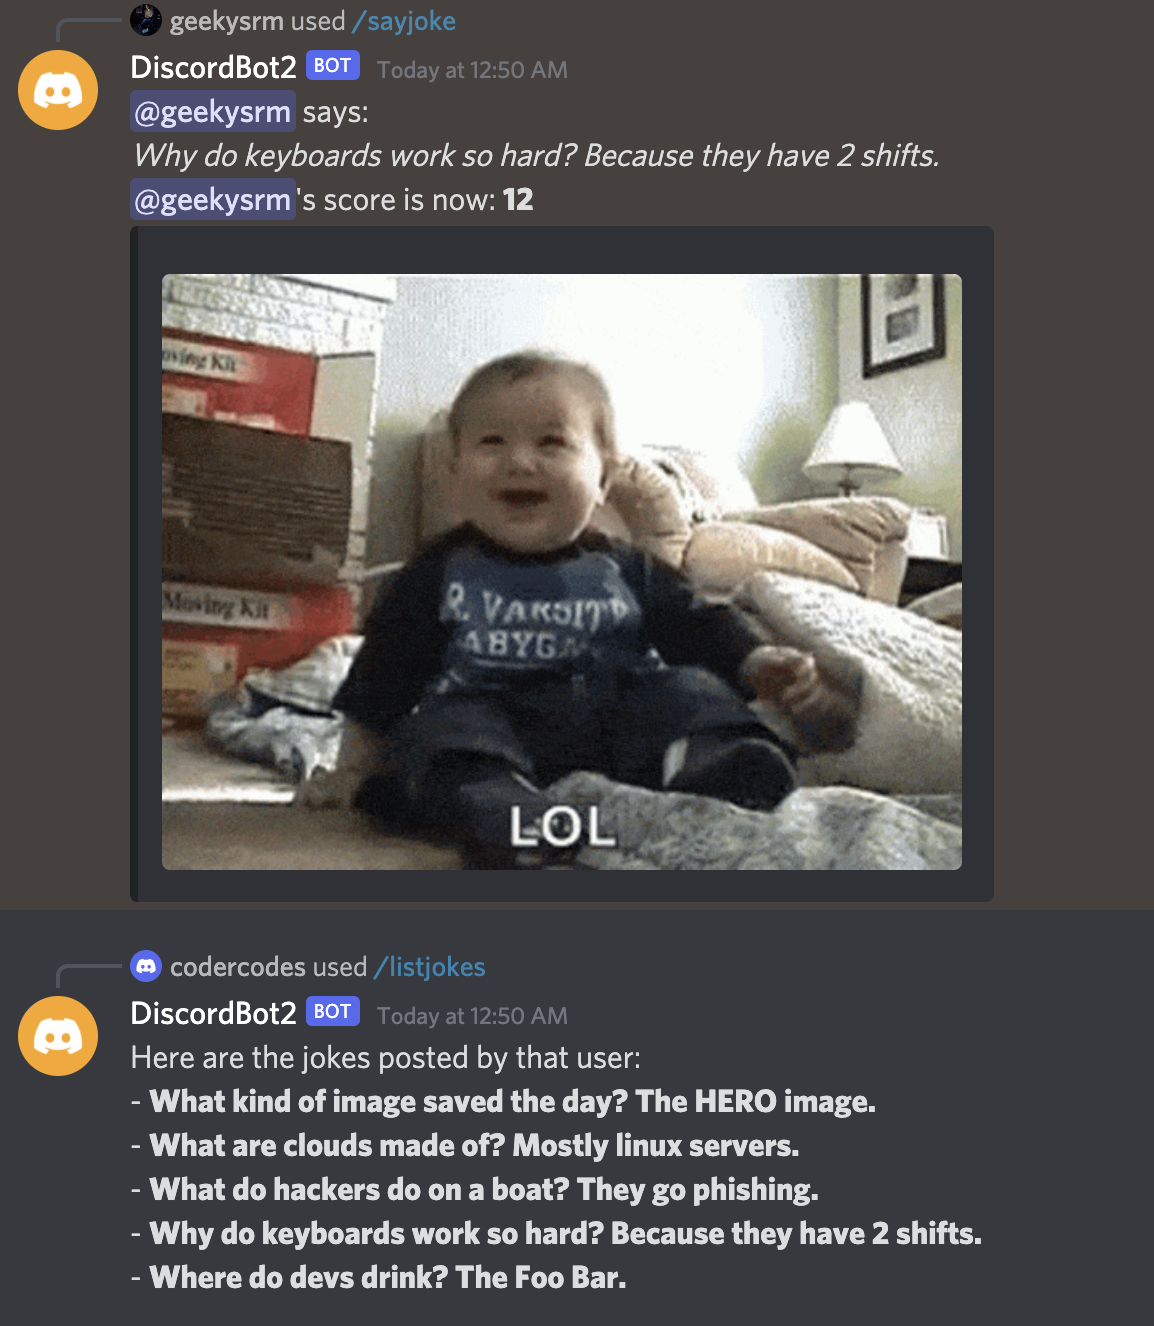
*A small demo of what we will be building*
## Prerequisites
Before starting off with this tutorial, make sure you have the following:
- [Node.js](https://nodejs.org/) and npm installed
- Basic JavaScript knowledge
- A discord.com account
- [Postman](https://www.postman.com/) or other REST API Client
- A code editor like [VS Code](https://code.visualstudio.com/download)
- A [HarperDB Account](https://studio.harperdb.io/sign-up)
## Installation
We need to set up our local environment first. Make sure to use node `v14.17.3` to avoid errors during installation.
So we will install the HarperDB package from `npm` using:
```bash
npm install -g harperdb
```
For more details and troubleshooting while installing, [visit the docs](https://harperdb.io/docs/install-harperdb/) .
You should be able to run HarperDB now on your local machine by running:
```bash
harperdb run
```
The local instance runs on port `9925` by default.
## Registering our local instance
Now that our local instance is up and running, we need to register our local instance on HarperDB studio.
Go ahead and [sign up](https://harperdb.io/) for a free account if you haven't already.
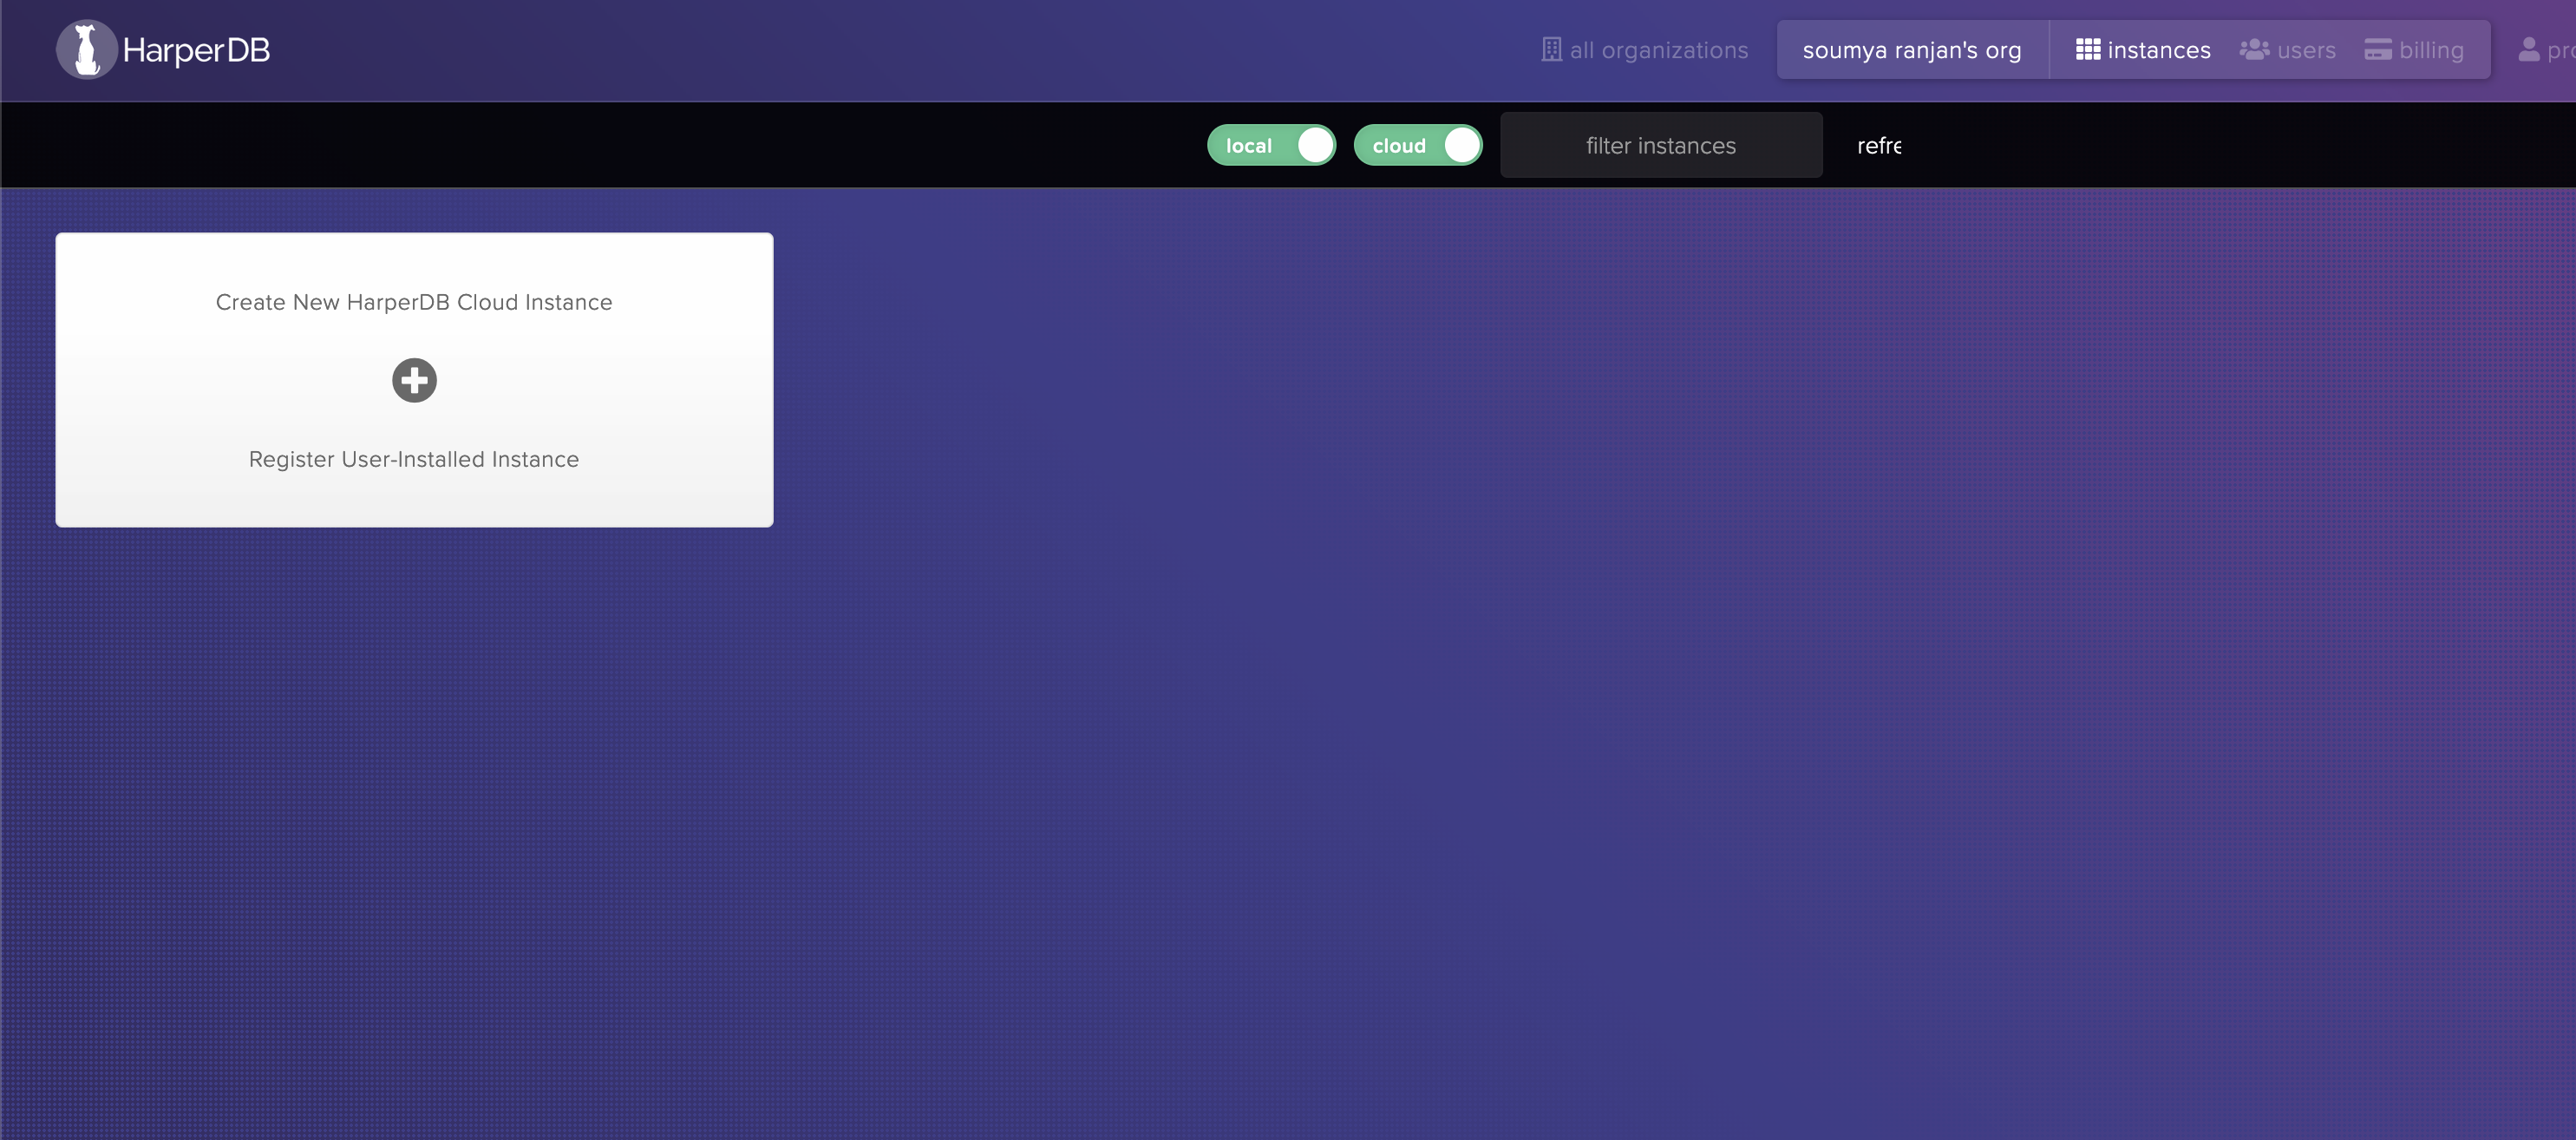
After login, click on **Create new HarperDB cloud instance / Register User installed instance**.
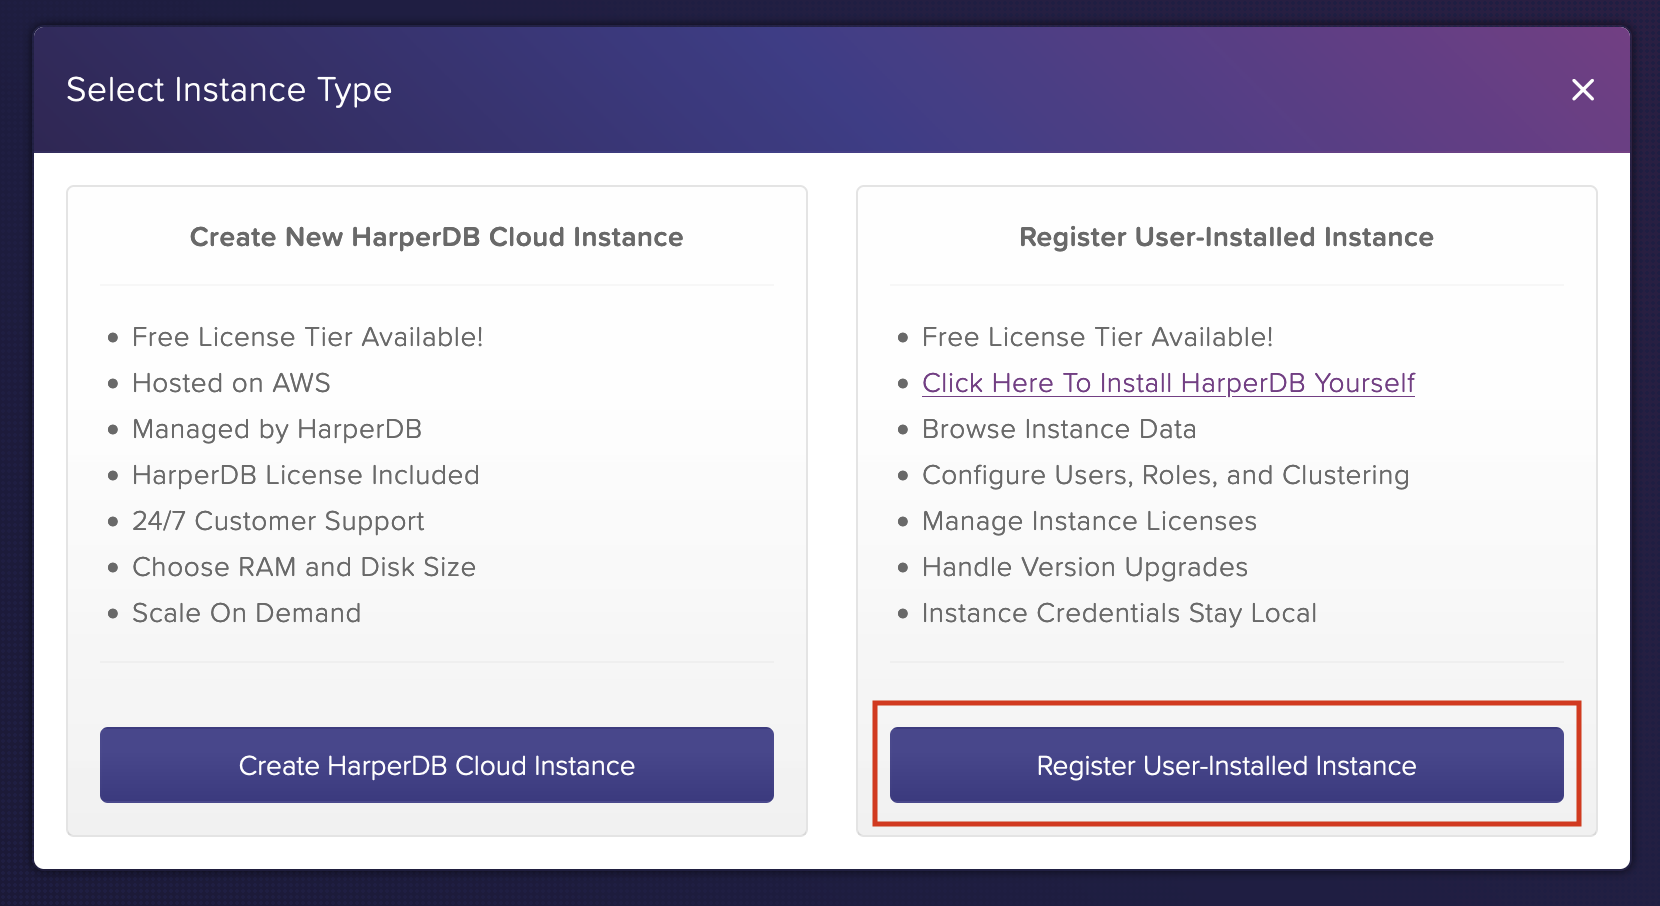
Now click on **Register User-installed instance**:
Now enter the following details for the local user instance running on localhost:9925:
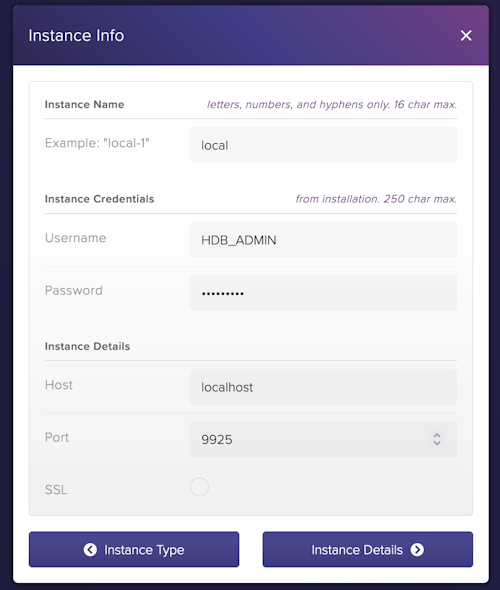
*the default id and password is HDB_ADMIN which can be changed later*
Select the free option for RAM in the next screen and add the instance in the next screen after that:
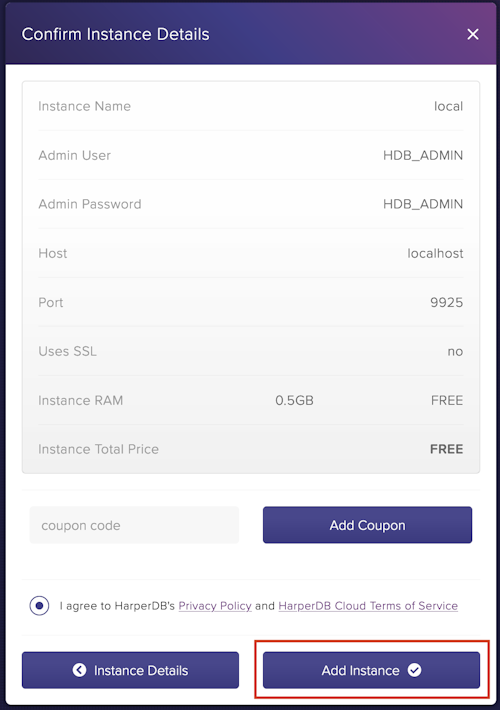
Wait for some seconds as the instance is getting registered.
## Configuring the local instance
Once the local instance is registered, on the following screen, you will see various tabs. Click on the **browse** tab and add the schema.
Let's name our schema `dev`:
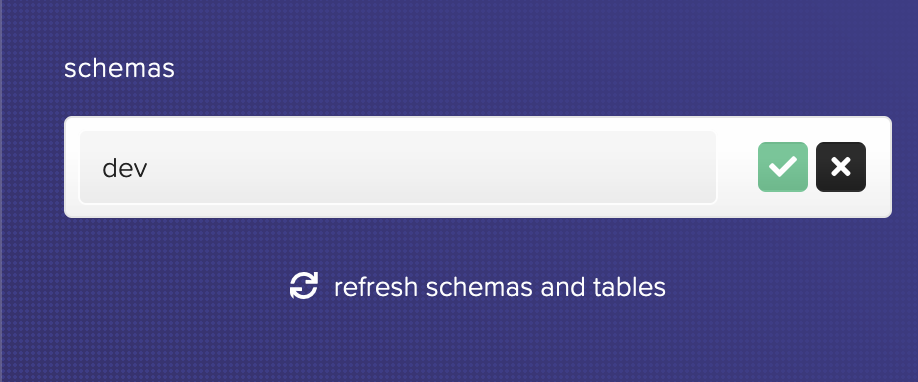
For the discord bot, we will need 2 tables: `users` and `jokes`.
The `users` table will hold user information like `id` (of the user from discord), `username` (discord username), `score` (count of number of jokes posted).
The `jokes` table will hold the jokes. It will have columns: `id` (of the joke), `joke` (joke text), `user_id` (id of the user who posted the joke).
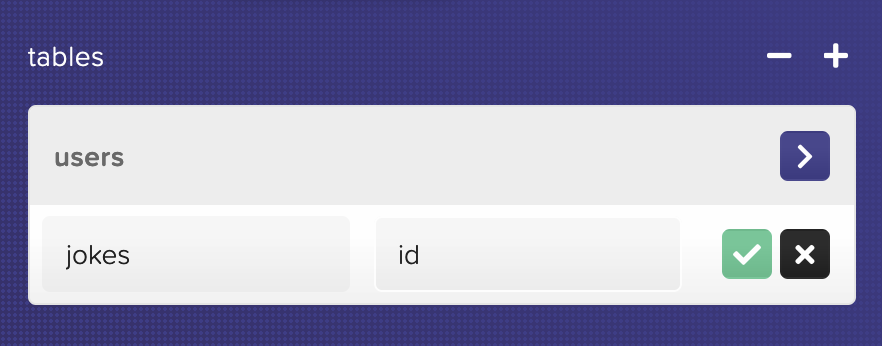
For now, let's create those 2 tables by clicking the + button:
1. `users` table with hash attr. as `id`
2. `jokes` table with hash attr. as `id`
## Custom Functions
Now we come to the most exciting part! Custom Functions! Custom functions are powered by Fastify.
Click on the **functions** tab and click on **Enable Custom Functions** on the left.
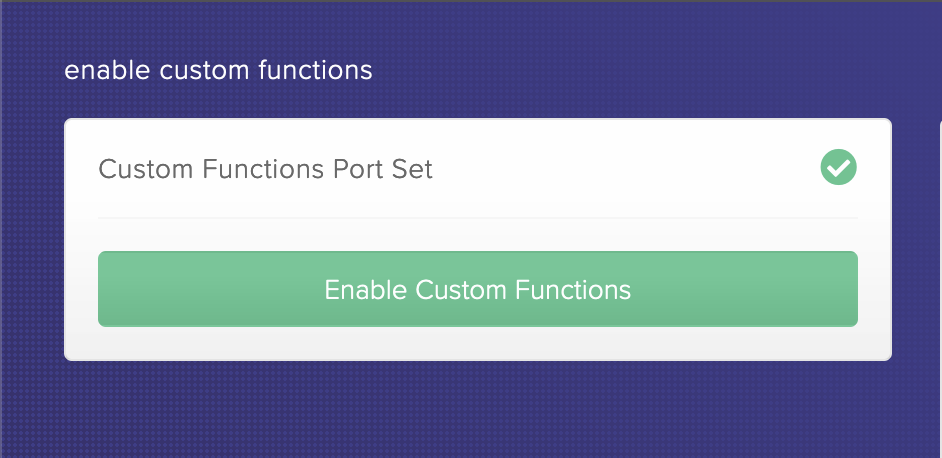
After you have enabled HarperDB Custom Functions, you will have the option to create a `project`. Let's call ours: `discordbot`.
You can also see where the custom functions project is stored on your local machine along with the port on which it runs on (default: `9926`).
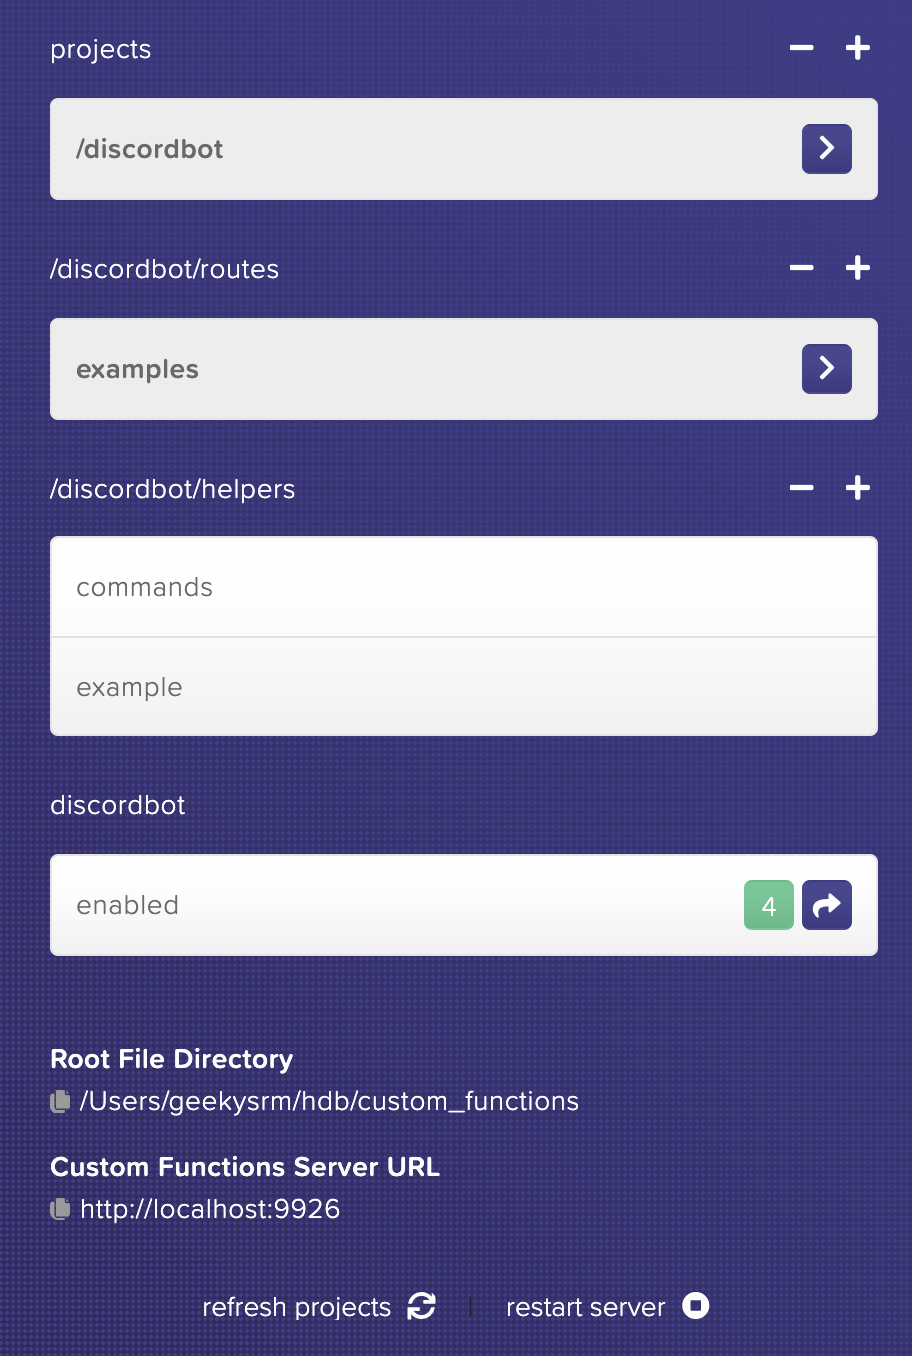
Fire up the terminal now, and change directory to where the custom functions project is present.
```bash
cd ~/hdb/custom_functions
```
Now let's clone a function template into a folder `discordbot` (our custom functions project name) provided by HarperDB to get up and running quickly!
```bash
git clone https://github.com/HarperDB/harperdb-custom-functions-template.git discordbot
```
Open the folder `discordbot` in your favourite code editor to see what code the template hooked us up with!
Once you open up the folder in your code editor, you'll see it is a typical npm project.
The routes are defined in routes folder.
Helper methods are present in helpers folder.
Also, we can have a static website running by using the static folder, but we won't be doing that in this tutorial.
We can also install npm packages and use them in our code.
## Discord Bot Setup
Before we write some code, let us set up our discord developer account and create our bot and invite it into a Discord server.
Before all this, I recommend you to create a discord server for testing this bot, which is [pretty straight-forward](https://blog.discord.com/starting-your-first-discord-server-4dcacda8dad5) . Or you can use an existing Discord server too.
Now, let's create our bot.
Go to [Discord Developer Portal](https://discord.com/developers/applications) and click "New Application" on the top right. Give it any name and click "Create".
Next click the "Bot" button on the left sidebar and click "Add Bot". Click "Yes, do it!" when prompted.
Now, we have created our bot successfully. Later we are going to need some information which will allow us to access our bot. Please follow the following instructions to find everything we will need:
**Application ID:** Go to the "General Information" tab on the left. Copy the value called "Application ID".
**Public Key:** On the "General Information" tab, copy the value in the field called "Public Key".
**Bot Token:** On the "Bot" tab in the left sidebar, copy the "Token" value.
Keep these values safe for later.
### Inviting our bot to our server
The bot is created but we still need to invite it into our server. Let's do that now.
Copy the following URL and replace with your application ID that you copied from Discord Developer Portal:
`https://discord.com/api/oauth2/authorize?client_id=&permissions=8&scope=applications.commands%20bot`
*Here we are giving the bot commands permission and bot admin permissions*
Open that constructed URL in a new tab, and you will see the following:
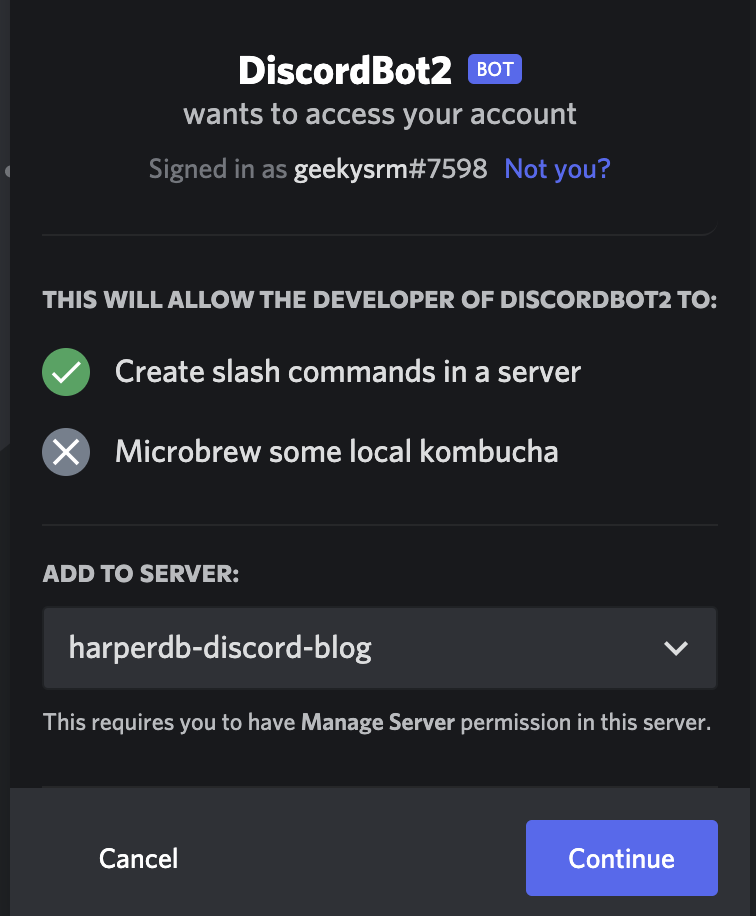
Select your server and click on **Continue** and then **Authorize** in the next screen. Now you should see your bot in your Discord server.
Now, let's finally get to some code, shall we?
## Get. Set. Code.
Switch to your editor where you have opened the `discordbot` folder in the previous steps.
First, let's install the dependencies we will need:
1. `npm i discord-interactions`: discord-interactions contains handy discord methods to make the creation of our bot simple.
2. `npm i nanoid`: nanoid is a small uuid generator which we will use to generate unique ids for our jokes.
3. `npm i fastify-raw-body`: For verifying our bot later using discord-interactions, we need access to the raw request body. As Fastify doesn't support this by default, we will use fastify-raw-body.
Open the **examples.js** file and delete all the routes present. We will add our routes one by one. Your file should look like below:
```js
"use strict";
// eslint-disable-next-line no-unused-vars,require-await
module.exports = async (server, { hdbCore, logger }) => {
};
```
Now, we will add our routes inside the file.
All routes created inside this file, will be relative to `/discordbot`.
For example, let's now create a GET route at `/` which will open at `localhost:9926/discordbot`
```js
server.route({
url: "/",
method: "GET",
handler: (request) => {
return { status: "Server running!" };
},
});
};
. . .
```
Now save the file and go to HarperDB studio and click on "restart server" on the "functions" tab:
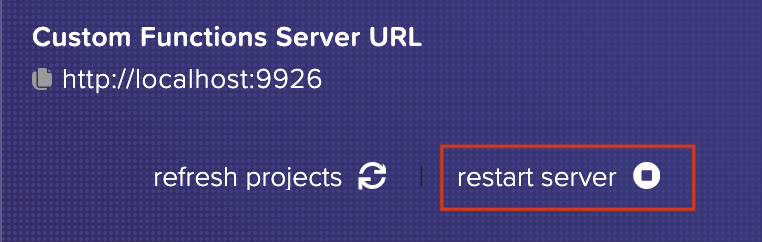
Anytime you make any change to the code, make sure to restart the custom functions server.
By the way, did you see that your code was reflected in the studio on the editor? Cool, right?
Now to see the results of your added route, visit `localhost:9926/discordbot` on your browser, and you should get a JSON response of:
```JSON
{
"status": "Server running!"
}
```
Yay! Our code works!
Now for the most exciting part, let's start coding the discord bot.
We will import `InteractionResponseType`, `InteractionType` and `verifyKey` from `discord-interactions`.
```js
const {
InteractionResponseType,
InteractionType,
verifyKey,
} = require("discord-interactions");
```
We will create a simple POST request at `/` which will basically respond to a `PING` interaction with a `PONG` interaction.
```js
. . .
server.route({
url: "/",
method: "POST",
handler: async (request) => {
const myBody = request.body;
if (myBody.type === InteractionType.PING) {
return { type: InteractionResponseType.PONG };
}
},
});
. . .
```
Now let's go to the Discord Portal and register our POST endpoint as the **Interactions Endpoint URL**.
Go to your application in Discord Developer Portal and click on the "General Information" tab, and paste our endpoint in the **Interactions Endpoint URL** field.
But oops! Our app is currently running on localhost which Discord cannot reach. So for a temporary solution, we will use a tunnelling service called **ngrok**.
*After we finish coding and testing our code, we will deploy the bot to HarperDB cloud instance with a single click for free.*
For Mac, to install ngrok:
```
brew install ngrok # assuming you have homebrew installed
ngrok http 9926 # create a tunnel to localhost:9926
```
For other operating systems, follow the [installation instructions](https://ngrok.com/download) .
Copy the `https` URL you get from ngrok.
Paste the following to the **Interactions Endpoint URL** field:
`YOUR_NGROK_URL/discordbot`.
Now, click on "Save changes". But we get an error:

So, actually discord won't accept ANY request which is sent to it, we need to perform verification to check for the validity of the request.
Let's perform that verification. For that, we need access to the raw request body and for that we will use `fastify-raw-body`.
Add the following code just before the GET `/` route.
```js
. . .
server.register(require("fastify-raw-body"), {
field: "rawBody",
global: false,
encoding: "utf8",
runFirst: true,
});
server.addHook("preHandler", async (request, response) => {
if (request.method === "POST") {
const signature = request.headers["x-signature-ed25519"];
const timestamp = request.headers["x-signature-timestamp"];
const isValidRequest = verifyKey(
request.rawBody,
signature,
timestamp,
// as a string, e.g. : "7171664534475faa2bccec6d8b1337650f7"
);
if (!isValidRequest) {
server.log.info("Invalid Request");
return response.status(401).send({ error: "Bad request signature " });
}
}
});
. . .
```
Also, we will need to add `rawBody:true` to the config of our POST `/` route. So, now it will look like this:
```js
. . .
server.route({
url: "/",
method: "POST",
config: {
// add the rawBody to this route
rawBody: true,
},
handler: async (request) => {
const myBody = request.body;
if (myBody.type === InteractionType.PING) {
return { type: InteractionResponseType.PONG };
}
},
});
. . .
```
(Don't forget to restart the functions server after each code change)
Now try to put `YOUR_NGROK_URL/discordbot` in the **Interactions Endpoint URL** field. And voila! We will be greeted with a success message.
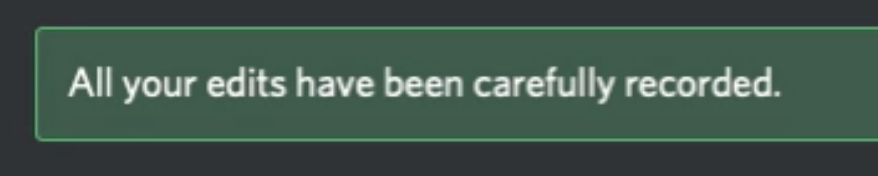
So, now our endpoint is registered and verified.
Now let's add the commands for our bot in the code. We will have 3 slash commands.
1. **/sayjoke ** : post a joke on the discord server.
2. **/listjokes **: view jokes of a particular user.
3. **/top**: check the leader with the max. number of jokes posted.
Let's first create a `commands.js` file inside the `helpers` folder and write the following code for the commands. We will be using this in the routes.
```js
const SAY_JOKE = {
name: "sayjoke",
description: "Say a programming joke and make everyone go ROFL!",
options: [
{
type: 3, // a string is type 3
name: "joke",
description: "The programming joke.",
required: true,
},
],
};
const TOP = {
name: "top",
description: "Find out who is the top scorer with his score.",
};
const LIST_JOKES = {
name: "listjokes",
description: "Display programming jokes said by a user.",
options: [
{
name: "user",
description: "The user whose jokes you want to hear.",
type: 6, // a user mention is type 6
required: true,
},
],
};
module.exports = {
SAY_JOKE,
TOP,
LIST_JOKES,
};
```
## Registering the slash commands
Before using these in the routes file, we will need to register them first. This is a one-time process for each command.
Open Postman or any other REST API client.
Make a New Request with type: POST.
URL should be:
[https://discord.com/api/v8/applications/YOUR_APPLICATION_ID/commands](https://discord.com/api/v8/applications/YOUR_APPLICATION_ID/commands)
On the Headers tab, add 2 headers:
```
Content-Type:application/json
Authorization:Bot
```
Now for each command, change the Body and Hit Send.
For sayjoke:
```JSON
{
"name": "sayjoke",
"description": "Say a programming joke and make everyone go ROFL!",
"options": [
{
"type": 3,
"name": "joke",
"description": "The programming joke.",
"required": true
}
]
}
```
You should see a response similar to this:
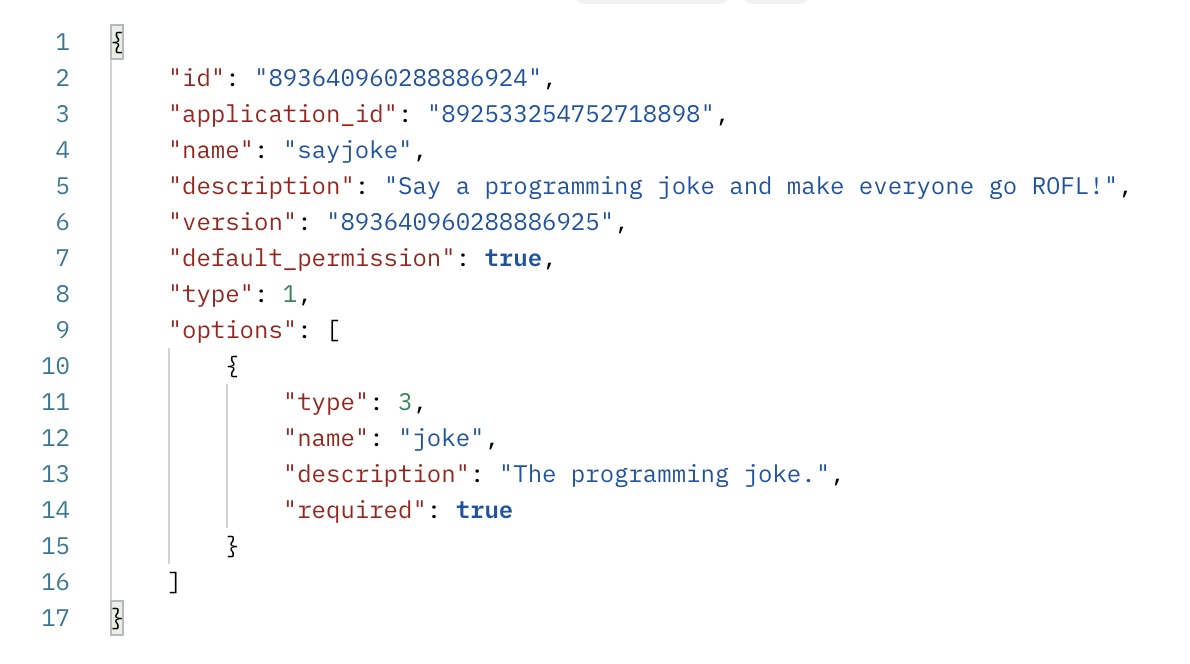
Similarly, let's register the other 2 commands.
For listjokes:
```JSON
{
"name": "listjokes",
"description": "Display all programming jokes said by a user.",
"options": [
{
"name": "user",
"description": "The user whose jokes you want to hear.",
"type": 6,
"required": true
}
]
}
```
For top:
```JSON
{
"name": "top",
"description": "Find out who is the top scorer with his score."
}
```
**NOTE**:
Now we have to wait 1 hour till all the commands are registered. If you don't want to wait, you can use your [Guild/server ID](https://github-wiki-see.page/m/manix84/discord_gmod_addon_v2/wiki/Finding-your-Guild-ID-%28Server-ID%29) . But in this case, your bot will work in that server/guild.
Just replace the URL with:
`https://discord.com/api/v8/applications/892533254752718898/guilds//commands`
Once your commands are registered, you should be able to see those commands popup when you type / on the chat.



But when you select any of these, you'll get an error. This is expected as we haven't written the code for these slash commands.
## Writing code for the slash commands
Hop over to the `routes/examples.js` file and let's write some more code.
We will add a condition to the `/` POST route to check if it is a slash command:
```js
. . .
server.route({
url: "/",
method: "POST",
config: {
// add the rawBody to this route
rawBody: true,
},
handler: async (request) => {
const myBody = request.body;
if (myBody.type === InteractionType.PING) {
return { type: InteractionResponseType.PONG };
} else if (myBody.type === InteractionType.APPLICATION_COMMAND) {
// to handle slash commands here
}
},
});
. . .
```
So inside the `else if` block, we are checking if the type is `InteractionType.APPLICATION_COMMAND` i.e. our slash commands. Inside this block, we will add the logic for handling our 3 slash commands.
Let's import the commands information from `commands.js` in `examples.js` file.
At the top of the file, add the following lines:
```js
const { SAY_JOKE, TOP, LIST_JOKES } = require("../helpers/commands");
```
### The /sayjoke command:
The `/sayjoke` command allows a user to post a programming joke to the Discord channel.
First, Let's add the code for `/sayjoke` command.
```js
// replace the existing line with below line
else if (myBody.type === InteractionType.APPLICATION_COMMAND) {
const user = myBody.member.user; // discord user object
const username = `${user.username}`; // discord username
const id = user.id; //discord userid (e.g. 393890098061771919)
switch (myBody.data.name.toLowerCase()) {
case SAY_JOKE.name.toLowerCase():
request.body = {
operation: "sql",
sql: `SELECT * FROM dev.users WHERE id = ${id}`,
};
const sayJokeResponse = await hdbCore.requestWithoutAuthentication(request);
if (sayJokeResponse.length === 0) {
// new user, so insert a new row to users table
request.body = {
operation: "sql",
sql: `INSERT INTO dev.users (id, name, score) VALUES ('${id}', '${username}', '1')`,
};
await hdbCore.requestWithoutAuthentication(request);
} else {
// old user, so update the users table by updating the user's score
request.body = {
operation: "sql",
sql: `UPDATE dev.users SET score = ${
sayJokeResponse[0].score + 1
} WHERE id = ${id}`,
};
await hdbCore.requestWithoutAuthentication(request);
}
const jokeId = nanoid(); // creating a new id for joke
const joke = myBody.data.options[0].value;
// insert the joke into the jokes table
request.body = {
operation: "sql",
sql: `INSERT INTO dev.jokes (id, joke, person_id) VALUE ('${jokeId}', '${joke}', '${id}')`,
};
await hdbCore.requestWithoutAuthentication(request);
const newScore = sayJokeResponse.length === 0 ? 1 : sayJokeResponse[0].score + 1;
return {
type: InteractionResponseType.CHANNEL_MESSAGE_WITH_SOURCE,
data: {
content: `<@${id}> says:\n*${joke}* \n<@${id}>'s score is now: **${newScore}**`, // in markdown format
embeds: [
// we have an embedded image in the response
{
type: "rich",
image: {
url: "https://res.cloudinary.com/geekysrm/image/upload/v1632951540/rofl.gif",
},
},
],
},
};
```
Woah! That's a lot of code.
Let's understand the code we just wrote step by step.
First of all, we get the user object from Discord containing all the details of the user who called this command.
From that object, we extract the username and id of the discord user.
Now, inside the `switch` case, we compare the name of the command to our 3 slash command names.
Here, we are handling the `/sayjoke` command.
We do a `SELECT` SQL query to HarperDB's database, to get the details of the user with the id as the userid we just extracted.
There are 2 cases:
1. New user: It might happen that we get `[ ]` from the `SELECT` query, which means we don't find the user in the users table. That means, he has posted a joke for the first time and we need to insert this user to our users table.
So, we use the `INSERT` SQL query to insert his id, name and score (as 1).
2. Old user: The user might be an old user i.e. already posted a joke earlier too.
So, we have that user in our users table. So we just update his row by increasing his score by 1. We use the `UPDATE` query to perform this operation.
Next, we need to insert the joke into the jokes table.
We get the joke text from `options[0].value` as joke is a required parameter for `/sayjoke`.
We use the `INSERT` query and insert the joke along with a unique jokeId and the id of the person who posted the joke.
Phew!
That was a lot of Database code.
Then, we simply need to respond to the user with some response. Discord response supports [Markdown](https://www.markdownguide.org/cheat-sheet/) so we are going to use that. Along with that we will also embed a [LOL gif](https://res.cloudinary.com/geekysrm/image/upload/v1632951540/rofl.gif).
### The /top command:
The top command would show the user with the highest number of jokes posted along with his score.
Here goes the code:
```js
case TOP.name.toLowerCase():
request.body = {
operation: "sql",
sql: `SELECT * FROM dev.users ORDER BY score DESC LIMIT 1`,
};
const topResponse = await hdbCore.requestWithoutAuthentication(request);
const top = topResponse[0];
return {
type: InteractionResponseType.CHANNEL_MESSAGE_WITH_SOURCE,
data: {
content: `**@${top.name}** is topping the list with score **${top.score}**. \nSee his programming jokes with */listjoke ${top.name}*`,
},
};
```
This one is pretty straight-forward. When anyone invokes the `/top` command, we simply do a `SELECT` query to fetch the user with the top score.
Then, we respond with some markdown content as shown in the code above.
### The /listjokes command:
The `/listjokes` command takes a required option i.e. the user. So, one can do `/listjokes @geekysrm` to get all jokes posted by user `geekysrm`.
Let's write the code for the same:
```js
case LIST_JOKES.name.toLowerCase():
const selectedUser = myBody.data.options[0].value.toString();
request.body = {
operation: "sql",
sql: `SELECT joke FROM dev.jokes WHERE person_id = ${selectedUser} LIMIT 5`,
};
const jokes = await hdbCore.requestWithoutAuthentication(request);
let contentString =
jokes.length === 0
? "User has not posted any jokes 😕"
: "Here are the jokes posted by that user:\n";
jokes.forEach(({ joke }) => {
contentString += `- **${joke}**\n`;
});
return {
type: InteractionResponseType.CHANNEL_MESSAGE_WITH_SOURCE,
data: {
content: contentString,
},
};
```
So, in the code above, we are performing a simple `SELECT` query on the jokes table to get 5 jokes of the user provided as an option in the command.
If the user has not posted any jokes, we reply with "User has not posted any jokes 😕".
Else, we display the jokes posted by that user.
We also add a simple default case to handle any invalid application command.
The full code for this file and the `helpers/commands.js` file is located [here](https://gist.github.com/geekysrm/1df4247baa3f74ee8b75fe1cbb8908be) .
## Deploying to Cloud Instance
As said above, all the code and data above are present in our local instance i.e. our local machine. Now let's move the code to the cloud, so that anyone can use it anytime.
Luckily for us, HarperDB makes it quite easy to deploy our local instance to the cloud.
Just a couple clicks, and we are done.
Let's start.
First, go to the HarperDB Studio Instances page and let's create a cloud instance:
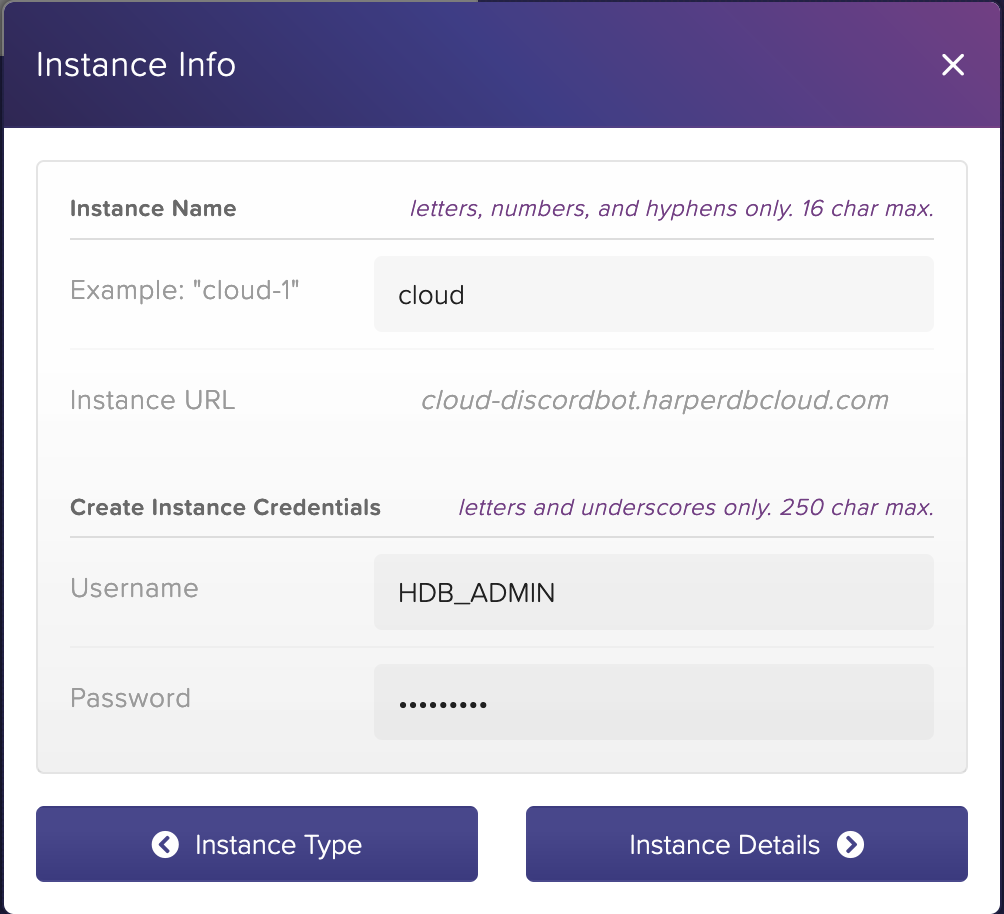
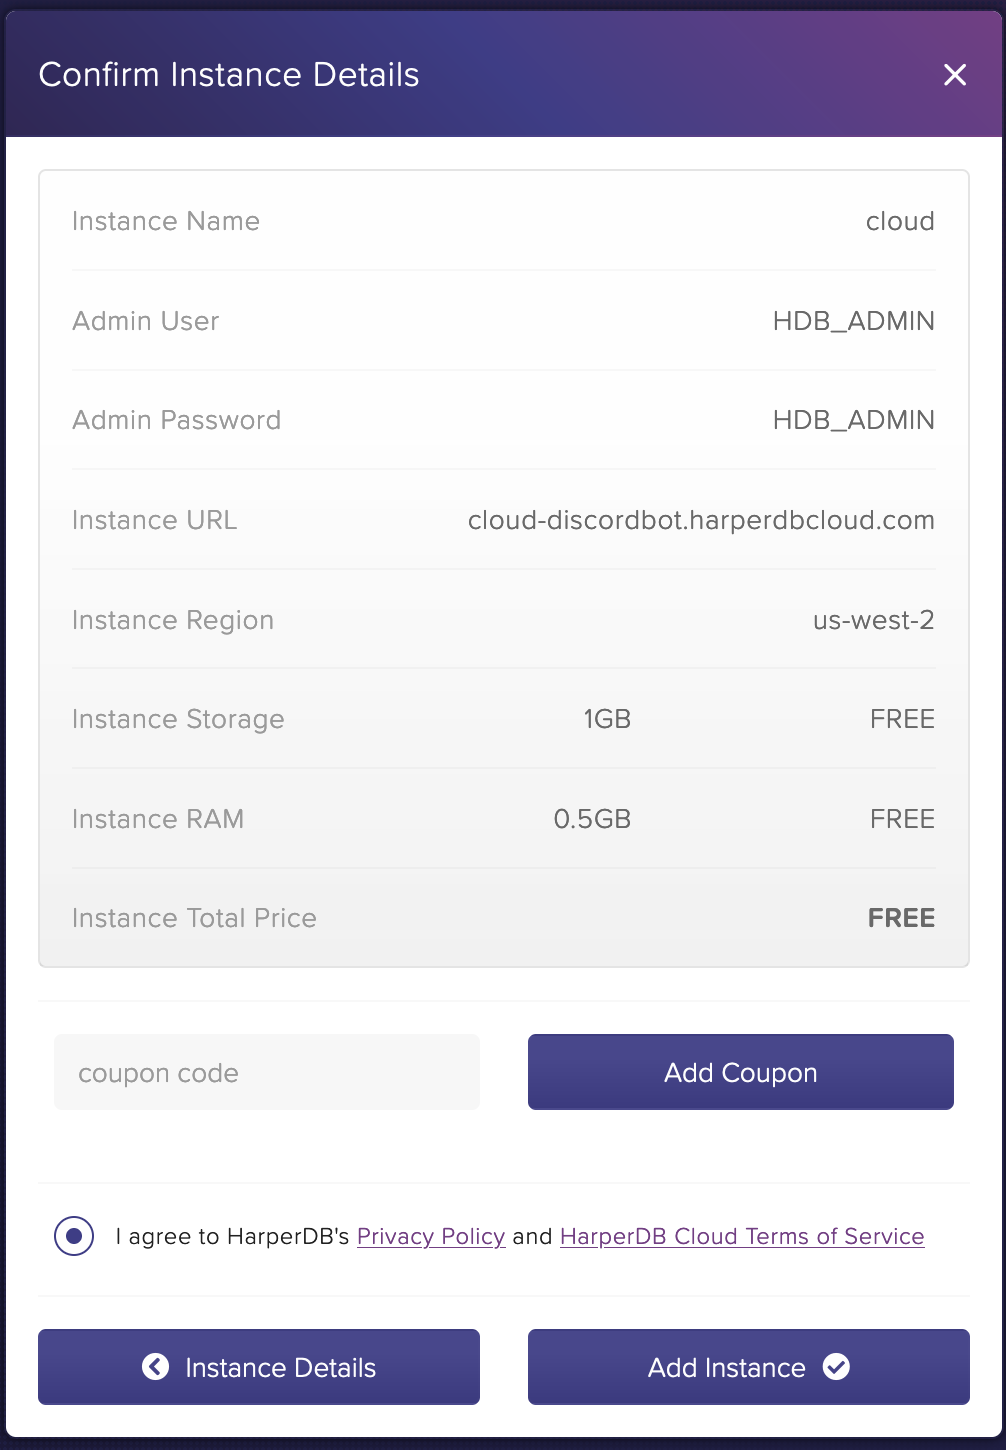
Let's name it `cloud` and choose all the FREE options:
Wait for some time till our Cloud Instance is being created.
Upon successful creation, create a new schema `dev` and 2 tables for that schema called `users` , `jokes` just like we did for our local instance.
Now switch to the **functions** tab, and click on **Enable Custom Functions**.
Then,
Let's switch back to our local instance now.
Go to the **functions** tab and you can see a **deploy** button on the top right.

Click on **deploy** and you will come across a screen like this:

Click the green **deploy** button to deploy your *local* custom functions to your *cloud* instance.
Wait for some time. And done!
Now our cloud functions are deployed on the cloud. Yes it's *that* easy!
## Using our cloud instance
Now that we have deployed our functions code to the cloud, we can now setup our Discord Bot to use this cloud URL instead of the `ngrok` URL which was basically our local instance.
Go to [Discord Developers Portal](https://discord.com/developers/applications) and then click on your application.
On the **General Information** tab, replace the **Interactions Endpoint URL** with the following:
`YOUR_HARPERDB_CLOUD_INSTANCE_URL/discordbot`
*If you named your custom functions project something else, replace `discordbot` with the project name.*
You should see a Success Message.
## Discord Bot Demo
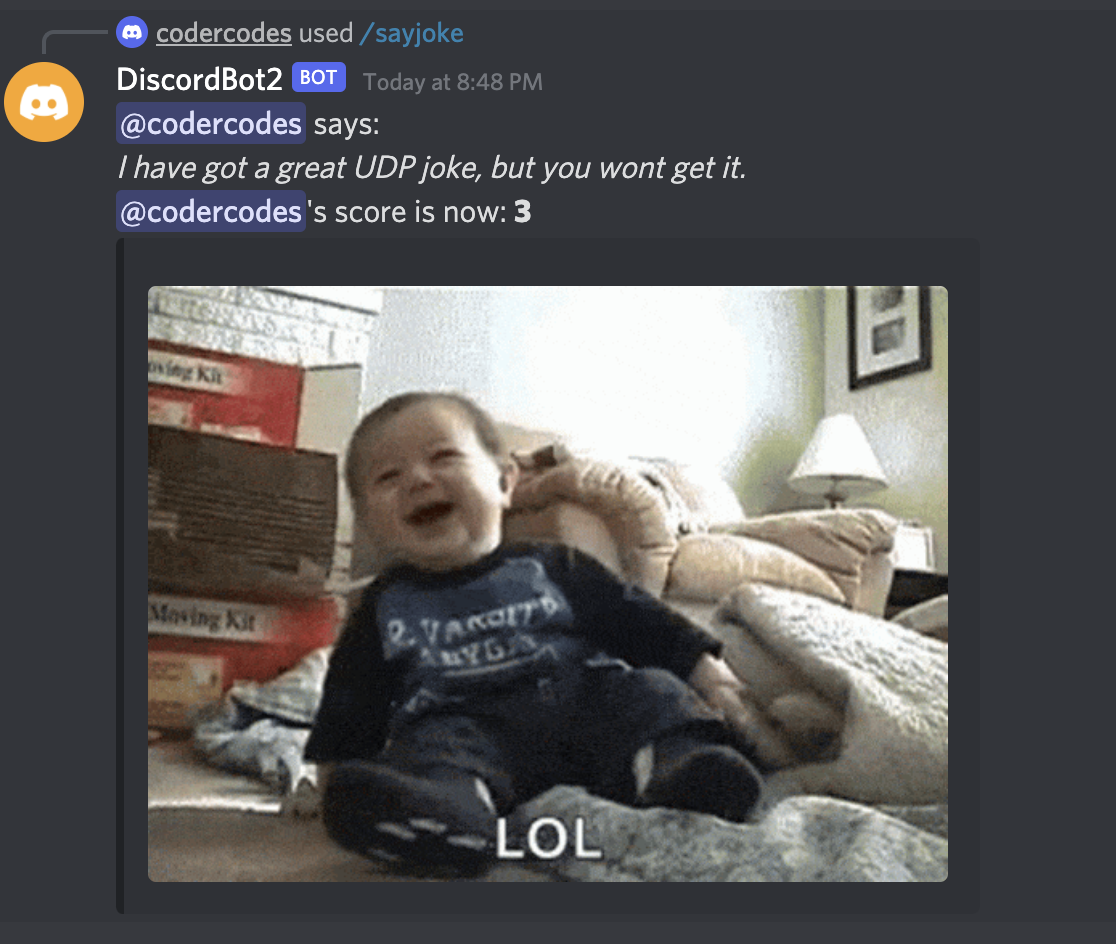
Now that it's deployed, go ahead and post some programming/dev jokes using `/sayjoke` command, find out if you are the topper with the max number of jokes using `/top` command or use `/listjokes` to find jokes posted by a particular user.
Here's our bot in action:
### /sayjoke ``
### /top
### /listjokes ``
Yay! 🎉🚀 Congratulations! Our bot works as expected!
## Conclusion
I hope this example helped you understand how easy it is to get started building APIs using the new Custom Functions feature from HarperDB.
The custom functions also support [static site hosting](https://harperdb.io/docs/custom-functions/host-a-static-web-ui/) . So you can use Vanilla HTML, CSS, JS or frameworks like React, Vue, Angular etc to create and host your static sites. We can cover this feature in a future tutorial!
Hope you have fun developing using HarperDB Custom Functions.
### Further documentation:
- [HarperDB Custom Functions docs](https://harperdb.io/docs/custom-functions/)
- [Getting started with HarperDB](https://harperdb.io/docs/getting-started/)